[Answer ID: 14255]
How can I setup wireless connection between two Access Points?
The following is setup procedure using Buffalo Professional firmware.
If you are trying to set up WDS using UserFriendly Firmware please refer to the link here.
Two different procedure are described bellow on how to setup wireless connection between two routers :
- Wireless Bridge Link
- WDS setup
| Wireless Bridge Link |
To Setup a wireless connection between Buffalo Professional firmware base Access Point and any other Access Point, Configure the the unit as a client bridge.
The simplest way to setup a wireless bridge connection between a Primary router that is connected to Internet and a secondary router is to configure the secondary router as Wireless "client Bridge" with the same wireless profile as primary router.
Wireless Bridge provides a transparent connection to all devices on the network.
The Wireless Bridge will connect two network segment.
The two segments are in the same subnet and look like two Ethernet switches connected by a cable to all computers on the subnet. Since the computers are on the same subnet, broadcasts reach all machines. DHCP clients in one segment can get their addresses from a DHCP server in the other segment.
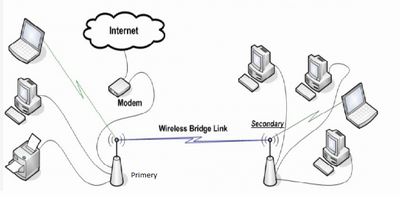
Primary router is connected to Internet and does not require any setup.
Primary router (in this example):
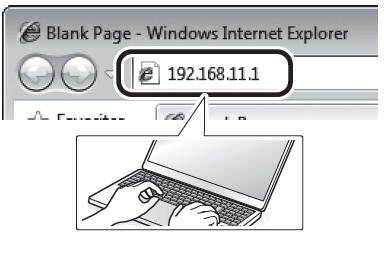
Primary IP Address: 192.168.11.1
Primary DHCP server address range : 192.168.11.2 ~ 192.168.11.63
- Connect PC to primary router .
- Record Primary routers DHCP address range and wireless profile : Authentication method, Encryption Method and Encryption Key.
- Reset the Secondary router device to factory default.
-
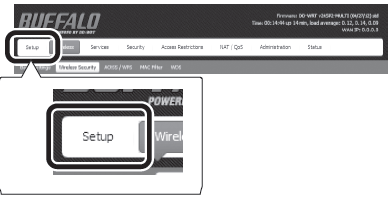
Login to secondary router and navigate to Setup | "Basic Setup" tab.
Under "Network Setup" change local IP if it is the same as primary IP. Choose an IP address that is outside of primary DHCP address pool (for example 192.168.11.200).
Next, Enter subnet mask, default Gateway and click the Save button.
Secondary Router IP:
Local IP Address : 192.168.11.200
Subnet Mask : 255.255.255.0
Gateway : 192.168.11.1
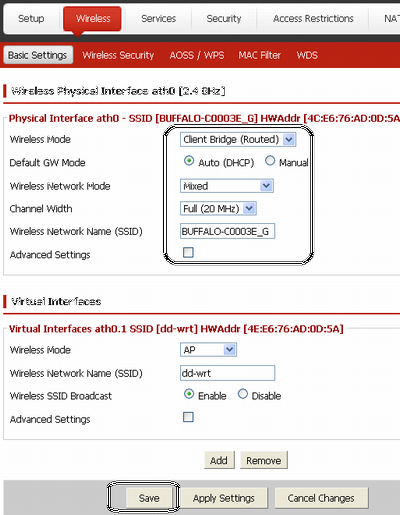
- Go to [Wireless] - [Basic Setup] tab.
- Change Wireless mode to "Client Bridge (Routed)" mode and SSID to same as primary router recorded in step 1.
- Click [Save] settings.
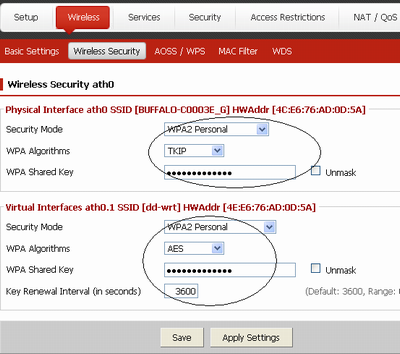
- Go to [Wireless] - [Wireless Security] tab.
- Set Wireless security to same as primary router recorded in step 1.
- Next go to [Security] - [Firewall] tab. Click (SPI Firewall) Disable option to disable Firewall .
Next, click [Apply Settings] Button.
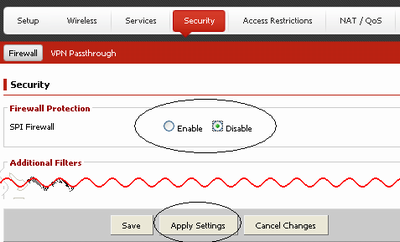
- Wireless Bridge setup is completed.
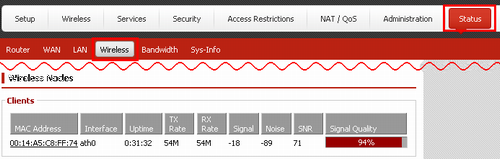
See Wireless Nodes at bottom of page under Status | Wireless tab.
| Wireless Distribution System (WDS) |
Wireless Distribution System (WDS) is a way to wirelessly connect two Access Points (AP) in order to extend wireless coverage area.
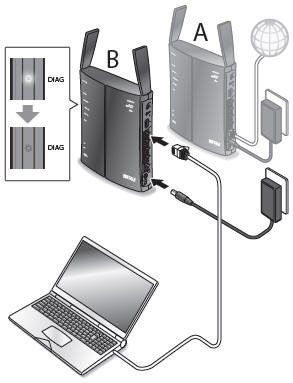
- In the following setup Router A is an existing AP and client PC is already connected to router A using router A wireless profile.
Start by recording the existing wireless router's profile : SSID, type of encryption, and key.
Next, disconnect wireless connection on setup PC.
- Connect new AP to power source. and PC LAN cable to (new ) Access Point B LAN port as shown bellow.
- Login to management (Web UI) interface. Next, Enter User name and password.
- Go to [Wireless] - [Wireless Security] tab.
- For the wireless mode, select "WDS Station" from the menu. For the SSID, you may enter any name you choose, such as "DD-WRTWDS".
Record the SSID that you chose.
Next Click "Add" Button.
Next, Click ADD
- Under "Virtual Interface", select "AP" for the wireless mode. Enter the SSID from step 1 and click [Apply Settings].
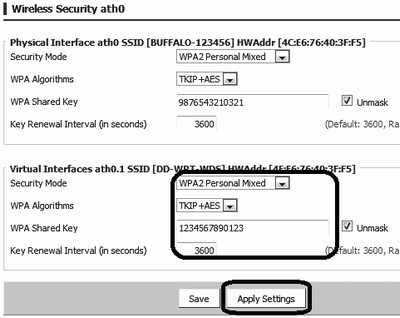
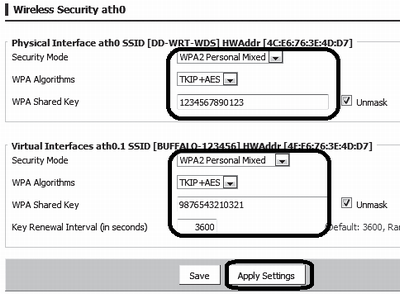
- Set Security by going to [Wireless] - [Wireless Security] tab.

- Now, configure wireless encryption. Under "Physical Interface", configure encryption for the SSID from step 5 (DD-WRT-WDS in the example).
Enter an encryption key and record the encryption settings that you choose.
Under "Virtual Interface", enter the encryption settings that you recorded in step 1.
- Click Setup tab to setup IP and disable DHCP server.
Note: Set IP address : use an IP in the same subnet as the WDS AP router but outside the WDS AP router's DHCP range. Write down the WDS AP's IP as the gateway and DNS on the WDS STATION.
Next, Click "Save" and "Apply Settings" button.

- Connect PC to A Router and login.
To log in, enter the username and password that you have set previously.

- Click Wireless and next click , Add to create a Virtual interface.
Under "Virtual Interface", select "WDS AP" for the wireless mode.
Enter the SSID from step 5 and click [Apply Settings].
- Click Wireless Security.
Under "Physical Interface", do not change the current settings.
Under "Virtual Interface", enter the encryption settings that you recorded in step 8.
- Turn Wireless back on to same wireless profile for existing AP (A).
Details