[Answer ID: 14461]
How do I setup VPN on Buffalo Router with UserFriendly Firmware ?
Created 07/18/2012 16:58 | Updated 09/12/2013 12:49
Virtual Private Network (VPN) allows for a secure connection to home or branch office over Internet.
VPN consists of two parts the server which is implemented in the Router and the Client VPN
which is used by the client PC application or OS to access office or home network.
User-Friendly implements standard VPN (PPTP - Point to Point Tunneling Protocol)
which is supported by windows OS.
To setup VPN
- Make sure the operating mode is Router Mode. Confirm Router LED is ON.
If router LED is OFF, use ROUTER switch to change operating mode to Router Mode. - After setup Internet connection, go to WEB UI diagnostic and
record your WAN or Internet IP. - Register for Dynamic DNS with DynDNS or TZO . DynDNS and TZO have dynamic DNS service
which translate your unique domain name "yourhostname.domainname.com"
to the temporary global IP given by ISP.
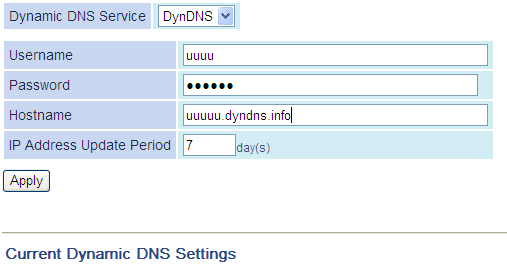
- Go to [WAN/LAN] - [DDNS] tab and select the DNS service you will be using.
Next enter your service account information. - Setup VPN Server. Go to [WAN/LAN] - [VPN Server].
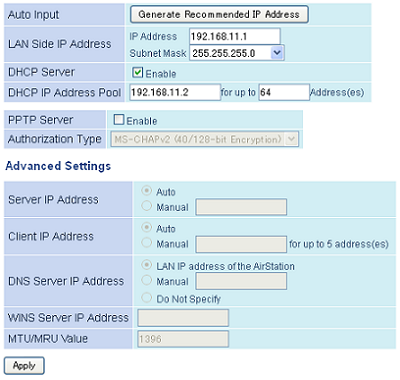
Please pay attention to IP address settings. If Server network is to be connected to another network,
to avoid duplicate IPs, set client IP such that it is allocated from none-overlapping IP pool.
Next, check Enable VPN option and push [Apply] Button. - To create a list of users that can access the network through VPN, click [Edit PPTP user list].
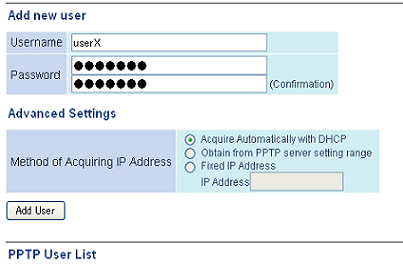
Enter user name and password. Next, push [Add User] button.
Keep a record of User name and passwords. You may test your setup using any 3rd party VPN client.
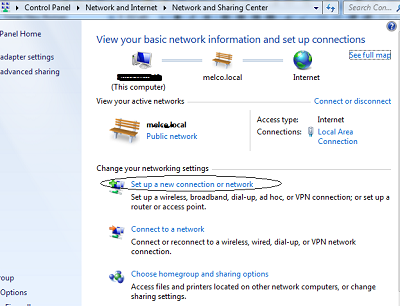
| VPN Connection using Windows 7 Client: |
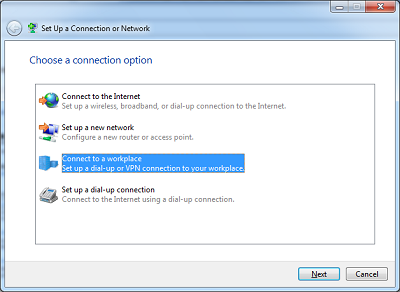
- Go start menu click [Control Panel] - [Network Sharing Center] and select [Setup a new connection or network].
- Select [Connect to workplace].
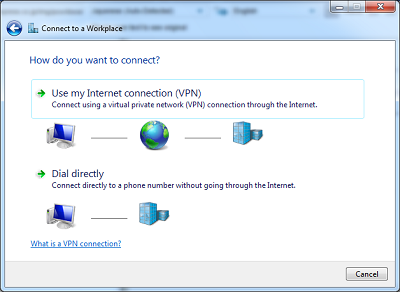
- Select [Use my Internet connection (VPN)].
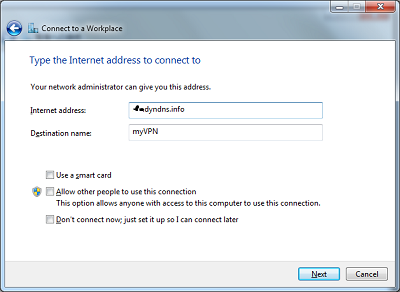
- Enter DDNS registered domain name and assign the connection a name.
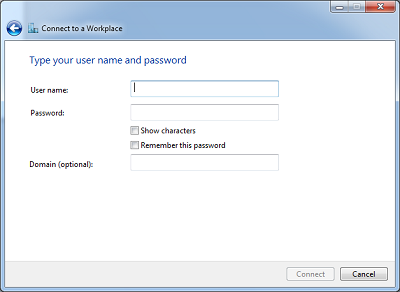
- Enter User name and password (from VPN setup step 4) .
Details
Products
OS / Hardware
Was this answer helpful?
Please tell us how we can make this answer more useful.