[Answer ID: 15184]
TeraStation 7000 – How to replace a hard drive and rebuild a RAID array in the TeraStation?
Hard drives in the TeraStation show a blue status LED during normal operation. When a drive fails, its error LED will glow red. A failed drive whose error LED is glowing red may be hot swapped.
Notes:
| • | Do not unplug a drive whose status LED is blue. Dismount it first or shut down the TeraStation before swapping a working drive. |
| • | When changing drives, the replacement drive should be a Buffalo OP-HDZH or OP-HDZS series drive of the same size. |
| • | To avoid damaging the TeraStation with static electricity, ground yourself by touching something made of metal before handling any sensitive electronic parts. |
| • | After a drive is replaced, it takes about 30 minutes before normal file reading and writing are restored. Settings may not be accessible during this period. |
| • | Do not change the order of the hard drives in the TeraStation. For example, pulling out drive 1 and replacing it with drive 2 may cause data to be corrupted or lost. |
| • | If the new drive is not recognized, click [Rediscover Disk] in Settings. |
Drive Replacement (using a redundant RAID mode such as RAID 1, 5, or 6 with auto-shutdown disabled)
Drive Replacement (using a redundant RAID mode such as RAID 1, 5, or 6 with auto-shutdown enabled)
Drive Replacement (RAID 0 or JBOD)
Drive Replacement (using a redundant RAID mode such as RAID 1, 5, or 6 with a hot spare configured)
Drive Replacement (using a redundant RAID mode such as RAID 1, 5, or 6 with auto-shutdown disabled)
This section describes replacing a drive with the TeraStation on.
| 1. |
The failed drive's status LED will be glowing red. Push its unlock button and swing the lock mechanism out.
|
| 2. |
Pull out the drive cartridge and remove it from the TeraStation.
|
| 3. |
Insert the new drive in the empty slot. Slide the drive in with the locking mechanism open.
|
| 4. |
Swing the lock back down until it clicks into place.
|
| 5. |
When the replacement hard drive is recognized, the status LED will flash red. The TeraStation will start rebuilding the RAID array automatically.
|
Drive Replacement (using a redundant RAID mode such as RAID 1, 5, or 6 with auto-shutdown enabled)
This section describes the process of replacing a drive while the TeraStation is off.
| 1. |
Push the unlock button of the failed hard drive and swing the lock mechanism out.
|
| 2. |
Pull out the drive cartridge and remove it from the TeraStation.
|
| 3. |
Insert the new hard drive in the empty slot. Slide the drive in with the locking mechanism open. Swing the lock back down until it clicks into place.
|
| 4. |
Press the power button on the TeraStation.
|
| 5. |
When the replacement hard drive is recognized, the status LED will flash red.
|
| 6. |
The TeraStation will start rebuilding the RAID array automatically.
|
Drive Replacement (RAID 0 or JBOD)
Drives in a RAID 0 array or JBOD mode do not automatically turn off in the event of a malfunction. Before replacing the failed drive, either dismount the drive from Settings, or shut down the TeraStation. This section describes the process of replacing a drive with the TeraStation on.
| 1. |
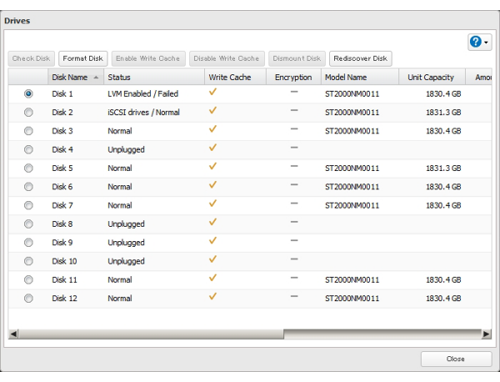
In Settings, navigate to [Drives] - [Drives].
|
| 2. |
Select the hard drive with the flashing status LED and click [Dismount Disk].
|
| 3. |
The status LED will stop flashing and glow steadily.
|
| 4. |
Unlock the failed drive by pushing the unlock button and swinging the lock mechanism out.
|
| 5. |
Pull out the hard drive cartridge and remove it from the TeraStation.
|
| 6. |
Insert the new hard drive (sold separately) into the empty slot. Slide the drive in with the locking mechanism open. Swing the lock back down until it clicks into place.
|
| 7. |
For RAID 0 When the replacement drive is recognized, the status LED will flash red and the message "Set From Web I32 New Diskx ready" will be displayed on the LCD panel. Select [Drives] - [RAID] - the RAID array In Settings and click [Delete RAID Array]. Select the replacement hard drive by navigating to [Drives] - [Drives] and clicking [Format Disk] to format the new drive. Configure RAID mode by selecting [Drives] - [RAID] after formatting the hard drive. If a hard drive malfunctions in RAID 0, all data on the RAID array will be lost. All of the settings for the shared folders (such as access restrictions) are erased after replacing a drive from a RAID 0 array. Create a shared folder before use.
For JBOD When the replacement hard drive is recognized, the status LED will flash red and the drive will be formatted as an individual drive. If this drive is removed from the TeraStation, shared folder settings such as access restrictions will be lost. Create a shared folder on the drive before use.
|
Drive Replacement (using a redundant RAID mode such as RAID 1, 5, or 6 with a hot spare configured)
If your TeraStation's drives are in a redundant RAID mode, and you have a hot spare enabled, a malfunctioning drive in the array is replaced by the spare disk and the RAID array is rebuilt automatically. The status LED will continue to glow red for the failed drive even after the RAID array is rebuilt with the hot spare. This section describes the replacement process for a hard drive while the TeraStation is still on.
| 1. |
The failed drive's status LED will be glowing red. Push its unlock button and swing the lock mechanism out.
|
| 2. |
Pull out the drive cartridge and remove it from the TeraStation.
|
| 3. |
Insert the new drive in the empty slot. Slide the drive in with the locking mechanism open. Swing the lock back down until it clicks into place.
|
| 4. |
When the replacement drive is recognized, the status LED will flash red. The replacement hard drive is automatically registered as a hot spare. To use the replacement disk as a normal drive rather than a hot spare, navigate to [Drives] - [RAID] and click the RAID array, select the new drive, and click [Set as a normal disk].
|
Details